Response to assignment 2.

My response to my feedback from assignment 2:

Firstly, I think I did quite well during this course again. I did have some unfortunate events happen to me during this assignment yet I still powered on and completed the work although I may not have spent as much time as wished on this part of the course, I do think if I spend more time developing onto my work I will improve and get more outstanding work. Throughout my feedback it is mentioned that a few of my pieces could have done with some extra work to fully make an improvement but I think I can take this feedback and act on it in my next assignment.

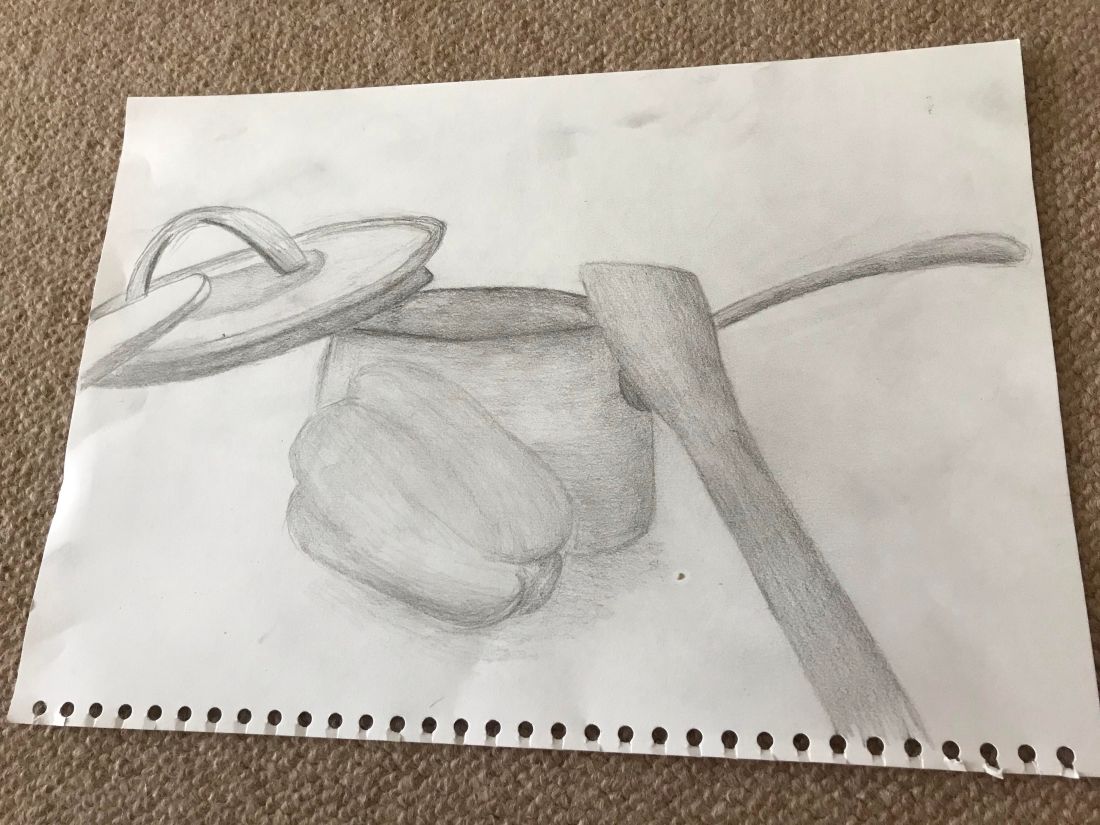
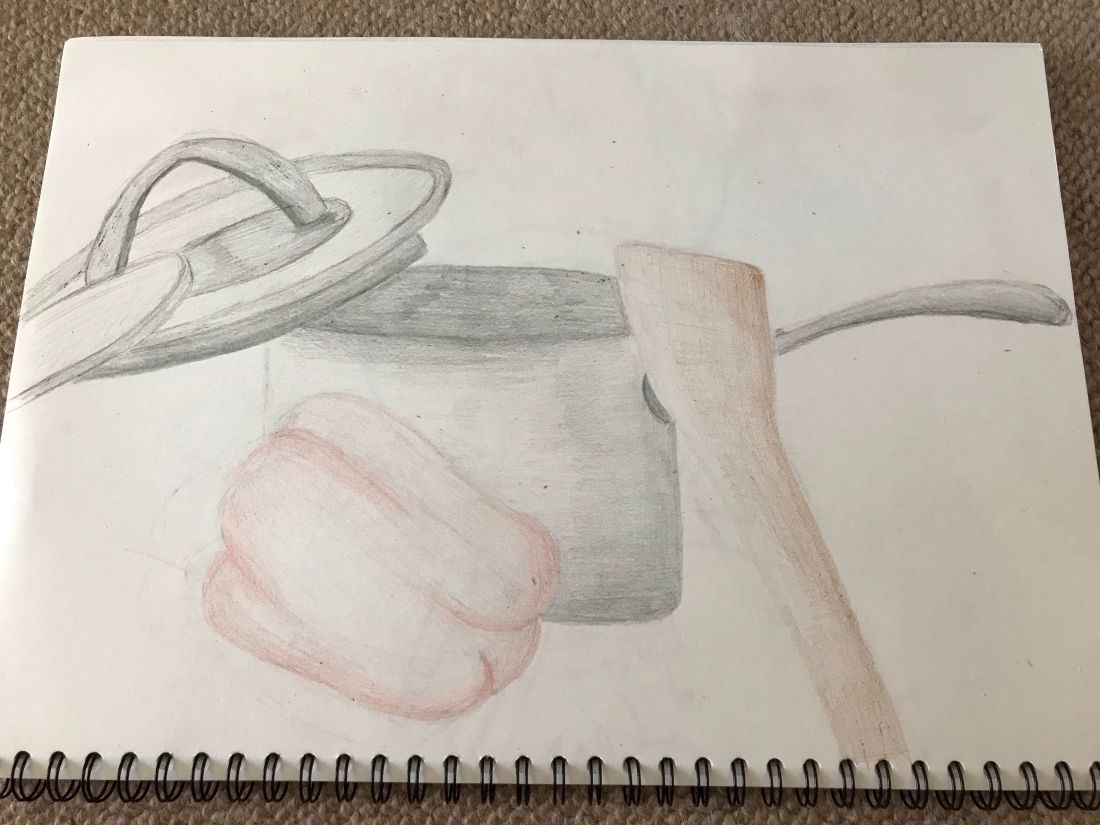
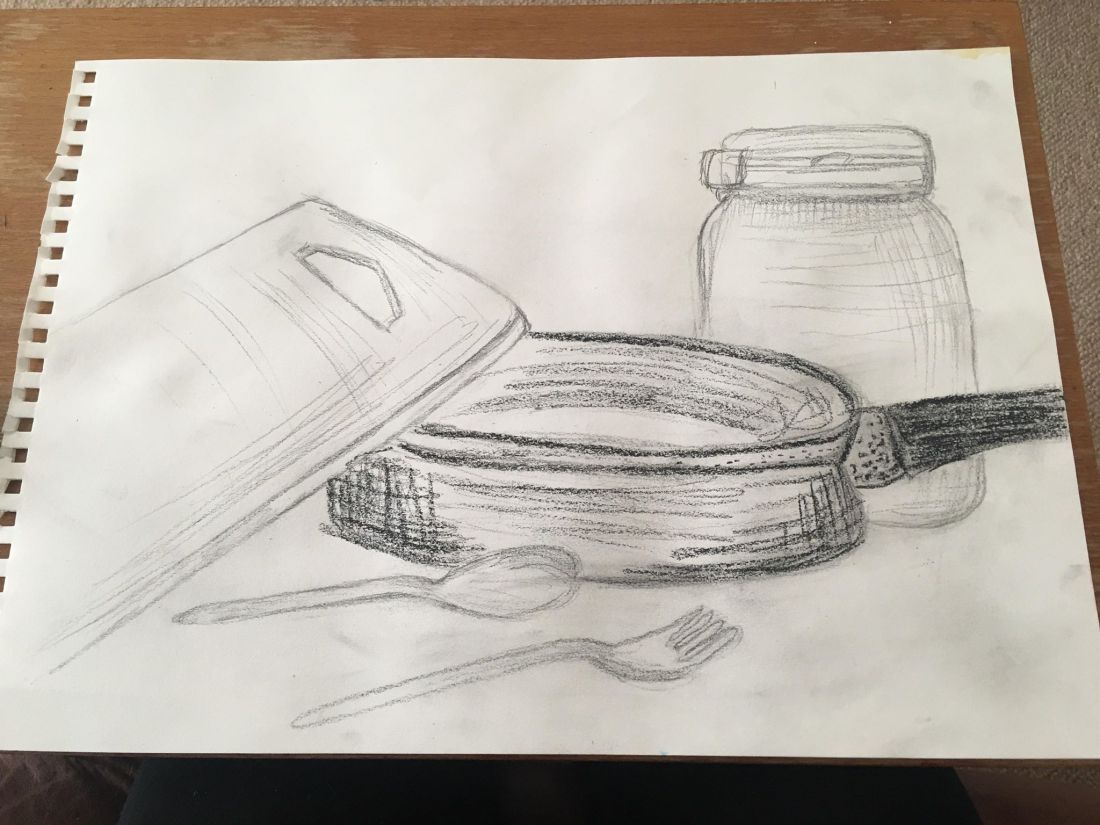
A lot of my feedback revolves around lack of depth perhaps due to working fast during this project but then also it’s mentioned I’m too heavy on the outer-line of my objects drawings and again paying less attention to the lighting, I may sometimes go off what I think would look right in a drawing and I need to stay clear of this because it doesn’t create an accurate and realistic piece of work. Also mentioned is for me to step out of my comfort zone and experiment with different materials as I always stick to what I know works best for me, I think I agree I do seem to use the same materials when doing my work just because I know that works for me but if I step out and try different things I may find new unique ways to display my work that I prefer.

Furthermore, it is talked about that it isn’t clear I am using my sketch book for independent  sketches, because of this I am going to make a strong effort to take more time to do quick sketches of still life and document them in my research part of my blog as well as reflecting my work to ideas from artist research.

In my list of things I should try and do it says about doing independent drawings in my sketch book and uploading them to my blog, my tutor also suggested watching youtube videos of certain artists to get me more appealed to using different materials and getting more ideas to experiment with my work. So I will make a strong effort to complete all of these task and spend more time on my work and picking out the materials I choose to use.


Assignment Two – Final piece’s.

For this assignment we were asked to experiment with colours and show different ways of mark making throughout taking ideas from our previous’ exercises to get a rough idea of what to do.

Therefore for this assignment I began with two small pieces to get an idea of some experimental work with mixed media. I wasn’t to keen on the results of these two designs so went back and thought through what might be better for me to do, therefore I went for a kitchen/cooking style still life and tried two methods I felt comfortable with.  Below is a picture of my first drawing where I just used a sketch pencil and toned with the shadows and tried to go in depth with the shadows etc.unnamed (1).jpg

As you can see in the final outcome of this piece I have tried hard to focus on the tonal work of these objects and have continuously used different mark making from crosshatching to using a rubber to make marks in the lighter parts of the objects. I like how this piece looks as I think the lay out of the objects is effective and you can clearly see where the light is hitting the still life. I feel like in this drawing I have developed within using harsh lines for the outline of the objects as in I haven’t shown heavy lines throughout and the tonal work in general is a big improvement on my past piece’s of work. I strongly enjoyed doing this still life piece and think the out come is good.

Moving on to piece two I took the same still life and just coloured the drawing in the best way I could seen as the big part of the picture was the pan which is already silver. Looking past that, it was a big difference to work with colour as I’m not usually one to work with coloured pencils yet I enjoyed doing it and think I’ll further with doing this in the future. Here is a picture below of my result:

unnamed (2).jpg

Again in this drawing I used a range of different mark makings to enhance the different tones of the objects, I do like how this piece turned out I think the colours pop the image out more and it makes it look more realistic, I think I still need to work more on using colours as it’s only been a couple of times for me using it, but I think doing more personal trials in my sketch book it will help me improve my skills. I am however happy with how this turned out, I think when I do these style of drawings again I will try and include a back drop to make the full image come more to life. All in all I think I have improved in my drawing skill since first starting and I’m happy with how I am coming along. I do think to improve my skills now I will try to add little details into my work and also doing a back setting will help the image come alive a lot more.

Response to assignment one feedback.

My response to my feedback from assignment one:

Firstly, when reading this feedback I was quite proud. I haven’t done any of this type of work or worked with some of the medias during assignment one so I was proud by what positive feedback I received, seen as I was new to this form of work and how things are set out I found it difficult to know whether or not I was doing the right layout of talking about my exercises in the right way but this feedback cleared my mind and I was deeply pleased by how positive it was.

During my feedback it was mentioned that during still life sketches I would sometimes draw what I thought was meant to be there or the shadows that would typically be on the object, when this was mentioned I had to think back and I realised that it could have been the problem. Some times I found myself getting a little confused on the lighting of where the sun hit it and when I mapped it out on my paper I thought it looked a bit odd so tweaked the lighting, however now looking at the feedback I know in future to show the visual lighting I see and get the most accurate of still life drawings I can. Even if the lighting and shadows may look odd I need to keep the realism and not let my mind envision something which isn’t there.

Furthermore, it was mentioned to spend more time doing some independent drawings away from the exercises therefore I am going to make a strong effort in doing quick sketches on the daily to help boost my drawing and visual skills in still life. My tutor also gave me an insight in some artists I should get involved in and research for some inspiration during this part of the course, therefore I think I will take more time in looking into different styles of work from different artists and get more inspiration in the different ways I can present my work.

In my feedback I got 4 bullet points of things I should aim for in my further work, one of them was to reflect on this feedback. The next point was to do more experimentation in my exercises and use a bigger variety of materials to learn how to have a wider range of skills in different materials not just a pencil. I was also then advised to do more observational drawings to widen my skills and get a better visual aspect on how things look when it comes to drawing, I will take this advise on board and take time to do sketches. The last point was to look into the artists she’d provided which I will take the time to get inspired by their pieces of work and learn different techniques.

All in all I was so happy with my feedback from this first assignment, seen as it was my first one and I was just getting to know how to present my work and how to fully talk about my exercises when uploading them. I am proud with how well I actually did for my first time doing something like this and I am looking more confidently at my next assignment on the course.

Assignment One.

For this assignment we were asked to gather a bunch of items to create a still life piece of art gathering all the techniques we just learnt during our first few exercises and explore them more in one piece on either A3 or A2 piece of paper.

I decided to gather a bunch of kitchen utensils and objects therefore I had objects which connected in a way and looked right together and get a more realistic setting for my still life drawing, below is a picture of my sight:

53183586_2215865038730827_2723920408616108032_n.jpg

As shown on this picture above I wanted to create some different angles for all of the objects so they’re not just next to each other, instead I hid objects behind others and leaned things onto each-other therefore it created more of an interesting piece of work rather than just drawings of the objects. I found also in my previous tasks I had used objects depending on there shape and how they looked as objects next to each other rather than them connecting in a theme and there use therefore I wanted to change that and choose something I haven’t tried before; that being using objects which connect and are used in the same way.

Below is a picture of my result:

53352515_2322001208081325_6785604545889173504_n.jpg

In this drawing I wanted to use different techniques and materials which I have learnt to use and experimented with in my previous exercises, for this I first used a pencil to draft out my drawing and get all of the angles and shapes accurate, after this I went in more depth with my graphite and used different techniques such as cross hatching to show the darker tones and create some detail into my drawings. After this for the pan I wanted to go in with charcoal to get some more detail into this piece and work with a different material, in this part of the image I decided to use dots also to show the darker tones on the image.

All in all I found this piece went well, I think I wished I chose more intricate objects therefore I could’ve shown off my drawing skill more by showing detail within my objects yet I think I have shown the different techniques I have used within this piece. I like how the charcoal turned out and how I have learnt how to use this material more because in previous exercises I found it hard to control and do any type of tonal work with this material yet I am happy with the tones in this piece, I think this is just because I have become more used to using this tool and have adapted my drawing style with it. I think during these exercises and this assignment I have learnt different ways to present a drawing and how different materials can create different techniques within a drawing as well as focusing on the negative space as well as the positive space.

Experimenting with mixed media

In this exercise we were asked to experiment with using traditional art tools and adding non traditional art methods to the work to get used to working with different ways of creating art and experimenting with different techniques and materials.

Therefore for this exercise I decided to work with soft pastels and then go in with a paintbrush and work with water over the top. A method I haven’t experimented with before and I found the result interesting. Below is a picture of my result:


IMG_6942 2.jpeg


As shown I have decided to draw out a fruit bowl and then I went in with using soft pastels and smudging and working them in to try to create tones throughout each bit using different colours and also combining two different tones. I then decided to go in with water to see how that could effect the soft pastels to try to blend the colours more and create tones.

All in all I found this turned out well and I think the water over the top of the soft pastels turned out really well, I was surprised how well they blended together once using the water, I would try this technique again further in my art work because I found the combination turned out well.

Research- Negative and Positive space.

Negative and positive space.

For this task I have looked into negative and positive space, for this I have looked into a range of different artists to get a feel for how affective this technique of work can be. I wanted to see how different artists from around different era’s have used this technique within their work and to see how it stands out from different work.

James Abbott McNeill Whistler.BN-JE194_0703WH_M_20150630142403.jpg

This piece of work was significant in it’s time of release in 1871, this piece was different in this era due to the angle of his mother, back in this century it was known for portraits to be taken at a face on angle so the model was towards to painter, this work was not common in the 1800’s as his mother is sat to the side when being painted. This image shows the real impact of negative space due to the painting on the wall of the woman, this gives a sense of reality to the painting and shows you the life of what’s going on outside of the painting, the fact that it makes the viewer not just focus on the mother but also the rest of the picture, this shows how clever using negative space can be.

Rene Magritte.

My next artist I found interesting, the work is different and unique, his way of making art is to change the way we look into things and stretch the viewers beyond reality. His work amazed me as I looked more into it and how he changes perspective when you view his work.

Decalcomania 1966. Mysterious paintings by Rene Magritte

This image uses the negative space to represent the outline of the man, this image lets the viewer look in two sides of the image but see the same thing. The image is clever in the respect it has two sides of the image and the view focus’ of both sides. The artist uses the negative space of the image to show a different painting and to use it to let the viewer have two main things to focus on.

Patrick Caulfield. 

This artist I researched is more contemporary and use’s negative space in a way to enhance the image, he use’s the background as the main image. His work is bold, as I looked into his work I found it different to the other artists I have researched in the fact his work is more cartoon effect and he uses his negative space in different perspectives.

This image stood out to be as the artist has twisted the allusion in the main focus of the image being the background, the negative space has been made to be the full image, his work stands out in the fact the colours he uses for his backgrounds. The glasses stood on the shelf have been focused but the background is the full image. It shows how clever negative space can be, in the respect that it can change the full dynamic of the artwork and can create such different allusions.

Image result for patrick caulfield

This image by the same artist creates the same allusion but relates to the first artist I research in the fact he has used the full image as his space, the negative space has been used to connect to the viewer and there is not full part of this image to focus on and that’s what is clever about this artists work. They use the full canvas and don’t just use one part to focus on.

For this task I have discussed the meaning of negative and positive space and how it really can make a difference on how the art is shown. I think I have learnt how the negative space can be used in different ways and got inspiration from other artists who have used different ways for this technique. I have found this task beneficial in the fact I can see how different art can be made through negative space, it has shown me how I can change the way I work with composition in my work.